Picking a slicer can feel like picking a “secret sauce” for your printer. The right software doesn’t just generate G-code—it helps you avoid stringing, improve surface finish, and get reliable first layers without endless trial and error.
The good news: you don’t need to pay for a great slicer. Several free 3D printing slicers now offer advanced features like pressure/linear advance tuning, tree supports, variable layer height, and calibration tools that can push print quality way up.
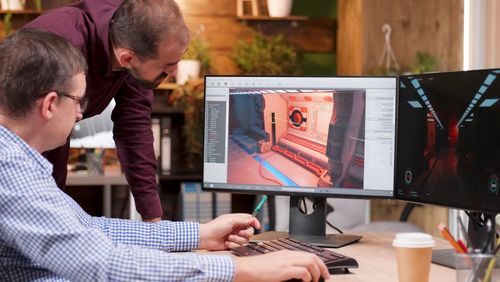
Below is a practical comparison of the top free options, with guidance on which one fits your printer, filament, and workflow.
What “high-quality prints” really depends on in a slicer
Print quality isn’t just layer height. The slicer’s toolpath decisions affect strength, accuracy, and how clean the part looks—especially on overhangs and fine details. When comparing free slicers, prioritize these capabilities:
- Support strategy: tree/organic supports, interface layers, and easy removal
- Extrusion control: pressure/linear advance support, wipe/coast options, retraction tuning
- Cooling logic: minimum layer time, fan ramping, bridge settings
- Adaptive detail: variable layer height, seam control, ironing (when appropriate)
- Calibration helpers: built-in test models, flow/temp tuning, first-layer tools
Compared: the best free 3D printing slicers right now
All of the slicers below are free to use and capable of excellent results. The “best” choice typically comes down to your printer ecosystem and how much control you want.
OrcaSlicer (power-user features without the pain)
If you like dialing in profiles and want modern tuning tools, orca slicer is a standout. It’s known for a streamlined calibration workflow and strong print-quality controls that help you quickly reduce ringing, improve seams, and get more consistent extrusion—especially on fast printers.
PrusaSlicer (reliable, detailed, and profile-rich)
PrusaSlicer is widely trusted for consistent results and excellent support generation. Even if you don’t own a Prusa printer, its profiles and thoughtful defaults make it a great “set it up once, print confidently” option for PLA, PETG, and ABS/ASA.
Ultimaker Cura (most popular, tons of plugins)
Cura’s strength is flexibility and ecosystem. With its huge user base, you’ll find profiles, troubleshooting tips, and extensions for nearly any printer. The tradeoff is that Cura can feel overwhelming—quality improves a lot once you understand which five settings matter most for your issues.
Bambu Studio (fast workflow, great for Bambu owners)
Bambu Studio offers a smooth experience, strong defaults, and a workflow designed for speed. It’s especially compelling if you’re in the Bambu ecosystem, where profiles and printer integration reduce guesswork and keep quality consistent across materials.
How to choose the right slicer for your printer and goals
Instead of chasing “the best slicer,” match the slicer to what you print and how you like to work:
- If you want quickest path to clean prints: choose a slicer with strong defaults and good profiles (PrusaSlicer, Bambu Studio).
- If you love tuning and calibration: pick a slicer with built-in calibration and advanced extrusion controls (often a big quality boost).
- If you need maximum community resources: Cura is hard to beat for tutorials and printer-specific advice.
- If supports are your bottleneck: prioritize organic/tree supports and support interface settings.
Settings that most improve quality (no matter the slicer)
Before you swap software, make sure you’ve addressed the settings that typically cause the biggest visible gains. Here’s a simple order of operations:
- First layer: correct Z offset, first-layer speed, and bed temperature
- Temperature + cooling: tune for each filament; fix drooping bridges and rough overhangs
- Flow/extrusion multiplier: reduces elephant foot, gaps, and blobby walls
- Retraction and travel: targets stringing and seam zits
- Seam placement + wall order: cleans up exterior surfaces on “presentation” parts
Tip: change one variable at a time and reprint a small calibration model. Most “mystery quality problems” are two settings fighting each other.
FAQ
Q: Which free slicer is best for beginners?
A: PrusaSlicer and Bambu Studio are typically easiest to start with because their default profiles are strong and the UI nudges you toward fewer risky changes.
Q: Do different slicers actually change print quality?
A: Yes. Toolpath generation, support algorithms, seam handling, and extrusion control can produce visibly different surfaces and more reliable overhangs—even at the same layer height.
Q: Should I switch slicers or just tune my settings?
A: If your current slicer lacks the features you need (better supports, calibration tools, or extrusion control), switching can save time. If it has them, tuning temperature, flow, and cooling usually delivers the fastest improvement.
Conclusion
The top free 3D printing slicers are all capable of professional-looking results—you’re mainly choosing the workflow and feature set that fits your printer and your patience for tuning. Start with a slicer that has solid profiles, then focus on a short list of high-impact settings (first layer, temp/cooling, and flow). Once those are stable, advanced features like seam control, adaptive layers, and smarter supports are what take prints from “good” to “great.”
In practice, the best approach is to pick one slicer, learn it well, and build a repeatable calibration routine—because consistency is what produces consistently high-quality prints.